How to Build a Lean-To Shed DIY: Simple Plans for Backyard Storage

How to Build a Lean-To Shed DIY: Simple Plans for Backyard Storage

How to Build a Lean-To Shed DIY: Simple Plans for Backyard Storage

Tired of garden tools scattered across your yard and overflowing garages? A lean-to shed offers a simple, cost-effective solution for extra backyard storage. This DIY project is surprisingly achievable, even for novice builders. Follow these steps and soon you'll enjoy the satisfaction of a custom-built shed perfect for your needs.

Planning Your Lean-To Shed

Before you grab your tools, careful planning is key. First, choose a suitable location. Consider proximity to your house or existing structures for easy access and potential connection to utilities. Assess the ground â€" level ground simplifies the foundation, while uneven terrain requires more leveling work. Determine the dimensions of your shed. A smaller lean-to is quicker to build, while a larger one offers more storage. Finally, check local building codes for any regulations regarding shed size and permits. You might need a permit depending on your location and the size of the lean-to.

Gathering Your Materials and Tools

Building a lean-to shed requires specific materials and tools. This list provides a comprehensive starting point; adjust quantities based on your chosen dimensions. Remember to purchase pressure-treated lumber for ground contact to prevent rot.

Materials:

  • Pressure-treated 4x4 posts for the foundation.
  • Pressure-treated 2x4s for the frame.
  • Plywood sheets for the walls and roof.
  • Roofing material (e.g., asphalt shingles, metal roofing).
  • Screws, nails, and other fasteners.
  • Exterior-grade paint or sealant (optional).

Tools:

  • Post hole digger or auger.
  • Level.
  • Measuring tape.
  • Circular saw or hand saw.
  • Drill and drill bits.
  • Hammer.
  • Shovel.
  • Safety glasses and work gloves.

Constructing the Foundation and Frame

Start by digging post holes for the foundation posts at each corner. Ensure the holes are deep enough to provide stability (at least 2-3 feet). Set the posts in the holes, ensuring they are plumb (perfectly vertical) using a level. Backfill the holes with concrete or compacted gravel to secure the posts. Once the concrete is set, build the frame using 2x4s, attaching them to the posts to create the walls and roof supports. Double-check your measurements and ensure all corners are square for a sturdy structure.

Adding Walls and Roof

Attach plywood sheets to the frame to create the walls. Use appropriate screws to secure the plywood. Remember to cut openings for doors and windows if desired. For the roof, attach plywood sheets to the rafters to create a sloped roof. Once the roof sheathing is complete, install your chosen roofing material, following the manufacturer’s instructions. Ensure proper overlap to prevent leaks.

Finishing Touches

Once the roof is on, you can add the finishing touches. Install a door, if you haven't already, and add hinges and a handle. Consider adding windows for ventilation and light. Finally, apply exterior paint or sealant to protect the wood from the elements and enhance the appearance of your new lean-to shed. Enjoy your new storage space!

Remember, safety first! Always wear appropriate safety gear, take your time, and don’t hesitate to ask for help if needed. Building a lean-to shed is a rewarding project that adds both function and charm to your backyard.

Share:

How to Build a Functional 8x12 Lean-To Shed for Your Outdoor Storage

How to Build a Functional 8x12 Lean-To Shed for Your Outdoor Storage

Building Your Own 8x12 Lean-To Shed: A Step-by-Step Guide

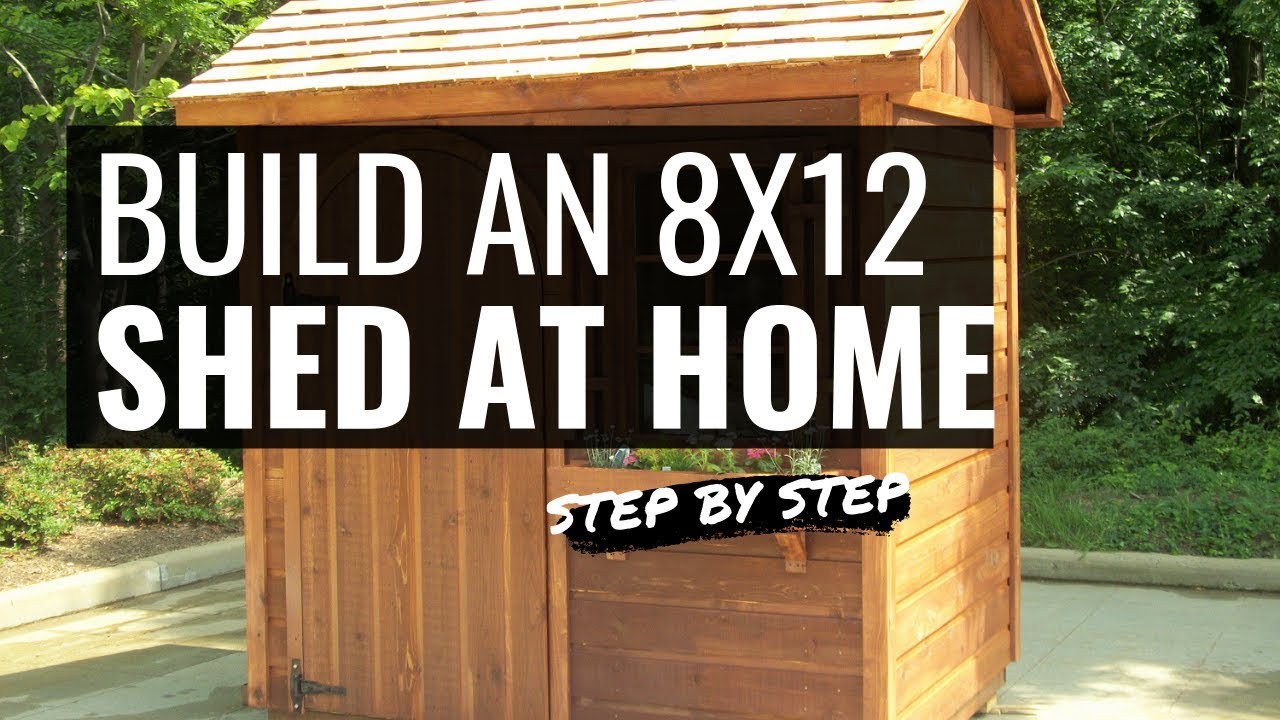
So, you're thinking about building a shed? Awesome! An 8x12 lean-to shed is a fantastic project for DIYers, offering plenty of storage space without being overwhelmingly complex. This guide will walk you through the process, from planning to the final touches. Think of me as your friendly neighborhood shed-building buddy, here to help every step of the way!

Phase 1: Planning and Preparation - Laying the Foundation (Literally!)

Before you even think about touching a nail, you need a solid plan. This isn't rocket science, but skipping this step will bite you later. Trust me on this one!

Choosing Your Location

Where will your glorious new shed live? Consider these factors:

  • Accessibility: Will you be able to easily get materials to the site? Will you have enough room to work comfortably?
  • Sunlight: Do you want a sunny or shady spot? Too much sun can fade stored items, while too little might make it damp.
  • Drainage: Avoid low-lying areas prone to flooding. You want a nice, dry foundation.
  • Building Codes: Check your local building codes and regulations. Some areas require permits for sheds of this size.

Gathering Your Materials

This is where a detailed list comes in handy. You'll need:

  • Pressure-treated lumber: For the frame, floor, and supports. This is crucial for longevity, especially if you live in a humid climate.
  • Roofing materials: Asphalt shingles are common and relatively inexpensive. Consider metal roofing for longer lasting durability.
  • Plywood or OSB sheathing: For the walls and roof.
  • Fasteners: Nails, screws, and possibly some construction adhesive.
  • Concrete mix (or paving stones): For the foundation.
  • Tools: Measuring tape, level, saw (circular saw is ideal), hammer, drill, shovel, post hole digger (if necessary).
  • Optional: Paint or stain for added protection and aesthetics, window for ventilation, door hardware.

Remember to get extra materials! It's always better to have a little extra than to run short and have to make a second trip to the hardware store.

Laying the Foundation

A solid foundation is key to a stable shed. You've got a couple of options here:

  • Concrete slab: This is the most permanent and sturdy option. Dig a level area, add gravel for drainage, and pour your concrete slab according to the mix instructions.
  • Gravel base: This is a quicker and less expensive option. Level the ground, add a layer of gravel, compact it down, and then add a layer of pressure treated plywood for the floor.
  • Paving stones: A nice middle ground, these offer a level surface and are relatively easy to install.

Phase 2: Framing - The Skeleton of Your Shed

Now for the fun part â€" building the frame! Take your time, measure twice (or three times!), and make sure everything is square and level.

Building the Floor Frame

This involves creating a rectangular frame using your pressure-treated lumber. Make sure the corners are perfectly square, using your level to check constantly. Attach your chosen flooring material (plywood or OSB) to the frame.

Constructing the Walls

Build your wall frames separately. Again, accuracy is vital here. Use your level and a square to ensure everything is plumb and square. Once the frames are complete, attach the sheathing.

Erecting the Walls and Attaching to the Floor

Carefully lift the walls and secure them to the floor frame using appropriate fasteners. Use temporary supports until the roof is on to keep everything stable.

Phase 3: Roofing - Keeping the Elements Out

The roof is what protects everything inside your shed. For an 8x12 lean-to, a simple gable roof is easiest.

Building the Rafters

Cut your rafters to the correct length and angle, and attach them to the top plates of your walls. Ensure they are evenly spaced and properly secured.

Attaching Sheathing to the Roof

Once the rafters are in place, add sheathing (plywood or OSB) to create a solid base for your roofing material.

Installing Roofing Material

Follow the manufacturer's instructions for your chosen roofing material (asphalt shingles, metal, etc.). This step can be a bit tricky, so take your time and don't rush.

Phase 4: Finishing Touches - Adding the Details

You're in the home stretch! Now it's time to add the finishing touches that will make your shed functional and attractive.

Installing Doors and Windows (If Applicable)

If you opted for a door and/or windows, now's the time to install them. Ensure they're properly sealed to keep out drafts and rain.

Adding Trim and Finishing

Add trim around the doors, windows, and edges to protect the edges of the sheathing and add a nice finished look.

Painting or Staining

Protect your shed from the elements by applying paint or stain. Choose a product designed for exterior use.

Commonly Asked Questions

Here are some questions I often get about building lean-to sheds:

Q: How long does it take to build an 8x12 lean-to shed?

A: This depends on your experience and how much time you can dedicate to the project. A skilled DIYer could build it in a long weekend, while someone less experienced might take a week or two.

Q: How much does it cost to build an 8x12 lean-to shed?

A: The cost varies widely depending on the materials you choose. You can expect to spend anywhere from a few hundred to a couple of thousand dollars.

Q: Do I need a permit to build a shed?

A: This depends on your local building codes. Check with your local authorities before you start building.

Q: What type of foundation is best for a lean-to shed?

A: A concrete slab is the most durable, but a gravel base or paving stones are less expensive alternatives.

Q: Can I build a lean-to shed against my house?

A: Yes, but make sure you understand local building codes, and plan for adequate ventilation to prevent moisture issues. Also consider if there's an impact on things like gutters.

Building a shed is a rewarding project. Remember to take your time, plan carefully, and don't be afraid to ask for help when you need it. Good luck, and happy building!

Share:

8x12 Shed Plans with Materials List: The Ultimate DIY Guide

8x12 Shed Plans with Materials List: The Ultimate DIY Guide

8x12 Shed Plans with Materials List: The Ultimate DIY Guide

So, you're thinking of building your own 8x12 shed? Awesome! It's a fantastic project that'll save you a ton of money and give you a real sense of accomplishment. This isn't some intimidating, impossible task; with a little planning and these step-by-step instructions, you can totally do this. I'm going to walk you through everything, from the initial planning stages to the final touches, including a comprehensive materials list. Let's get started!

Planning Your 8x12 Shed: The Foundation

Before you even think about grabbing a hammer, you need a solid plan. This isn't just about throwing some lumber together; you want a sturdy, long-lasting shed. Think about what you'll be using the shed for. Will it be storing gardening tools, lawnmowers, or maybe even a small workshop? This will influence your design choices and the materials you'll need.

Choosing Your Location:

Where will your shed live? Consider access, sunlight, drainage, and proximity to power (if you need it). Make sure you check your local building codes â€" you might need permits depending on your location and the shed's size. You don't want to start building only to discover you're breaking the rules!

Choosing Your Foundation:

This is crucial for stability and longevity. A simple gravel base is the easiest and cheapest option, perfect for lighter sheds. For a more permanent solution, consider a concrete slab or concrete piers. A concrete foundation will protect your shed from moisture and pests.

Gathering Your Materials: The Shopping List

This is where things get really specific. This list is a guideline â€" you might need to adjust quantities based on your design and the specific lumber you source. Always buy a little extra, just in case!

Lumber:

  • Pressure-treated 4x4 posts: For your foundation posts (number depends on your foundation type â€" at least 4 for a simple shed)
  • Pressure-treated 2x4s: For the framing, walls, and roof supports (a LOT of these â€" around 100+ depending on design)
  • Pressure-treated 2x6s: For the floor joists and roof rafters (at least 20+)
  • Plywood sheathing: For the walls and roof (at least 2 sheets of 4x8)
  • Roofing material: Asphalt shingles, metal roofing, or whatever you prefer (amount depends on roof size)
  • Exterior siding: Vinyl, wood, or metal (amount depends on wall size)

Fasteners & Other Materials:

  • Galvanized nails: Various sizes, including 8d, 10d, and 16d
  • Exterior-grade screws: For added strength and easier assembly
  • Simpson Strong-Tie connectors (optional): These add extra structural support, especially helpful for larger sheds.
  • Concrete mix (if using a concrete foundation): This will depend on your foundation's size
  • Gravel (if using a gravel base): A significant amount â€" a cubic yard or more
  • House wrap: To protect the shed from moisture
  • Paint or stain (optional): To protect and enhance the appearance of your shed
  • Door and window hardware: Hinges, handles, locks

Building Your 8x12 Shed: Step-by-Step

Alright, let's build! This is a simplified overview; you'll need more detailed plans for exact measurements and specifics. Refer to those plans throughout this process.

Step 1: Prepare the Site and Foundation

Level the ground, lay down your chosen foundation (gravel, concrete, etc.), and set your foundation posts.

Step 2: Construct the Floor Frame

Build the frame for your floor using pressure treated 2x6s as joists and then add plywood sheathing. Make sure it's level and square.

Step 3: Build the Wall Frames

Assemble the wall frames using 2x4s. Remember to include openings for doors and windows.

Step 4: Erect the Walls

Carefully raise the wall frames onto the floor frame and secure them.

Step 5: Install the Roof Trusses or Rafters

Construct or purchase pre-made roof trusses (easier) or build your own rafters. This is a crucial step for structural integrity.

Step 6: Add Sheathing to the Roof and Walls

Apply the plywood sheathing to the roof and walls, ensuring proper overlap and nailing.

Step 7: Install the Roofing Material

Lay down your chosen roofing material (shingles, metal, etc.), following manufacturer instructions.

Step 8: Add Siding and Trim

Install your exterior siding and add trim to finish the look.

Step 9: Install Doors and Windows

Hang your doors and windows, making sure they're securely fastened and operate smoothly.

Step 10: Final Touches

Add any finishing touches, such as painting, staining, or installing shelves.

Safety First!

Building a shed is rewarding, but safety is paramount. Always wear appropriate safety gear, including safety glasses, work gloves, and hearing protection. Use caution when operating power tools and always follow manufacturer instructions.

Commonly Asked Questions

Q: Do I need a permit to build an 8x12 shed?

A: It depends on your local building codes. Check with your local authorities to determine if a permit is required.

Q: How long will it take to build an 8x12 shed?

A: This varies widely depending on your experience and the complexity of the design. Expect to spend several weekends, possibly more, for a DIY build.

Q: Can I build this shed by myself?

A: While possible, it's much easier and safer to have a helper, especially for lifting and securing larger components.

Q: What's the best type of wood to use?

A: Pressure-treated lumber is highly recommended for its resistance to rot and insects.

Q: How much will it cost to build an 8x12 shed?

A: Costs vary greatly depending on material prices and your choices. Expect to spend several hundred dollars at a minimum. You might save more money if you reuse some materials and acquire them from used markets.

Building your own 8x12 shed is a challenging but incredibly rewarding project. Remember to plan carefully, gather your materials, and take your time. With patience and the right guidance, you'll soon have a beautiful and functional new shed to enjoy!

Share:

Building a 6x8 Shed: Materials, Plans, and Cost Breakdown

Building a 6x8 Shed: Materials, Plans, and Cost Breakdown

Building Your Dream 6x8 Shed: A Complete Guide

So, you're ready to build a shed? Fantastic! A 6x8 shed is a perfect size for a beginner project â€" manageable yet rewarding. This guide will walk you through everything from planning and materials to the cost breakdown, offering a realistic peek into the whole process. Let's get started!

Planning Your 6x8 Shed

Before you even think about buying lumber, you need a plan. This isn't about architect-level blueprints, but a solid understanding of what you want your shed to be.

Purpose and Features

What will you use your shed for? Storage of gardening tools? A workshop? A place for your motorcycle? The purpose dictates things like shelving, electrical needs (if any), and even the type of flooring you'll choose. For instance, a workshop needs more robust flooring and potentially electrical outlets, while a simple storage shed can get away with a more basic setup.

Location, Location, Location!

Where will your shed live? You'll need to consider things like:

  • Accessibility: Will you need a path or driveway leading to it?
  • Sunlight: Do you want a sunny spot or a shadier one?
  • Ground conditions: Is the ground level? Will you need to level it?
  • Local regulations: Check your local building codes and homeowner's association rules regarding shed size, placement, and permits.

Choosing Your Shed Design

Simple is best for a first-time builder. Consider a basic rectangular design with a single door. You can always add more complex features later. Online resources offer tons of free shed plans; just search for "6x8 shed plans" and you'll find plenty of options. Many offer different levels of detail â€" pick one that suits your experience level.

Materials List for Your 6x8 Shed

This is a *general* list. The exact quantities will depend on your specific design and plan. Always buy a little extra â€" better to have leftovers than to run short mid-project.

  • Pressure-treated lumber: For the foundation (skids or concrete piers), floor joists, sill plates, and wall framing. The exact dimensions and quantities will vary greatly depending on your chosen plan. You'll need enough for a strong and stable frame.
  • Exterior siding: Choose a material like plywood, vinyl, or metal siding depending on your budget and aesthetic preference. Consider factors like weather resistance and maintenance requirements.
  • Roofing material: Asphalt shingles are popular and relatively inexpensive. Consider the climate when choosing â€" some materials are better suited for heavy snow or intense sun.
  • Door and window (optional): The size and style will depend on your design. Pre-hung doors are easiest to install.
  • Fasteners: Nails, screws, and bolts â€" plenty of them! Use galvanized or exterior-grade fasteners to prevent rust.
  • Concrete (optional): If you're planning a concrete foundation.
  • Other materials: This will include things like roofing felt, house wrap, flashing, paint or stain, and any interior finishing materials you might choose (shelving, etc.).

Cost Breakdown: Building a 6x8 Shed

Pricing can vary wildly based on your location, the materials you choose, and whether you'll do the work yourself or hire a contractor. This is a rough estimate for a basic shed; adjust accordingly:

  • Lumber: $300-$600
  • Siding: $200-$500
  • Roofing: $150-$300
  • Door & Window (if applicable): $100-$300
  • Fasteners & Hardware: $50-$100
  • Concrete (if applicable): $100-$200
  • Other Materials: $100-$200
  • Tools (if you don't already own them): $100-$500 (This is a one-time cost)

Total Estimated Cost: $1,100-$2,700

Remember, this is just an estimate. Prices fluctuate, and the more luxurious materials you choose, the higher the cost will go. Getting multiple quotes for lumber from different suppliers can significantly impact your budget.

Step-by-Step Construction (Simplified)

This is a high-level overview. Detailed instructions will be found in your chosen shed plans.

  1. Prepare the site: Level the ground, remove vegetation, and mark out the shed's dimensions.
  2. Build the foundation: This could be concrete piers, a gravel base, or skids. Your plan will specify the method.
  3. Construct the floor: Lay down the floor joists and decking.
  4. Erect the walls: Frame the walls according to your plans.
  5. Install the roof: Build and attach the roof trusses or rafters, and then apply roofing felt and shingles.
  6. Add the siding: Cover the exterior walls with your chosen siding material.
  7. Install the door and windows: Carefully install these components.
  8. Finish the interior (optional): Add shelving, paint or stain the interior walls, and complete any other desired interior work.

Remember to always prioritize safety! Wear appropriate safety gear (safety glasses, gloves, hearing protection) and take your time. Building a shed is a process, and rushing can lead to mistakes and injuries.

Commonly Asked Questions

  • Do I need a building permit? This depends on your local regulations. Check with your city or county's building department before you start.
  • How long does it take to build a 6x8 shed? This depends on your experience and the complexity of your design. Expect to spend a few weekends to several weeks, depending on your pace and skill level.
  • Can I build a shed by myself? Yes, it's possible, especially for a simple 6x8 shed. However, having a helper can make the process much easier and safer, especially for lifting heavy materials.
  • What tools do I need? A basic tool set will include a measuring tape, saw (circular saw or hand saw), hammer, level, drill, and possibly a nail gun. Your specific plan might require additional tools.
  • What kind of wood should I use? Pressure-treated lumber is ideal for the foundation and framing due to its resistance to rot and insects.
  • How much does it cost to hire someone to build a shed? Hiring a contractor can significantly increase the cost, often doubling or tripling the DIY cost, depending on their rates and the complexity of the build.

Building a 6x8 shed can be a challenging but incredibly rewarding project. With careful planning, the right materials, and a little patience, you'll soon have a brand-new storage solution (or workshop!) to enjoy. Good luck and happy building!

Share:

Build a Strong and Reliable 8x12 Storage Shed with These Simple Plans

Build a Strong and Reliable 8x12 Storage Shed with These Simple Plans

Build a Strong and Reliable 8x12 Storage Shed

Tired of clutter overflowing your garage or house? Dreaming of a dedicated space for your gardening tools, sports equipment, or holiday decorations? Building your own 8x12 storage shed is a rewarding project that provides a practical solution and a significant sense of accomplishment. This detailed guide walks you through constructing a robust and reliable shed, perfect for years of dependable storage. Forget flimsy structures; this plan focuses on strength, longevity, and ease of construction â€" even for first-time builders.

Planning and Preparation: Laying the Foundation for Success

Before you even touch a single tool, meticulous planning is crucial. Begin by securing the necessary permits from your local authorities. This step, while seemingly bureaucratic, prevents future headaches and ensures your shed complies with local building codes. Next, choose your location carefully. Consider proximity to power sources (if needed), access for deliveries, and drainage to avoid water accumulation around the shed's base. Finally, meticulously level the ground where your shed will stand. A perfectly level foundation is the backbone of a sturdy structure; use a spirit level and adjust the ground as needed to ensure stability.

Choosing Your Materials: Quality Over Quantity

The materials you select directly influence your shed's durability. Opt for pressure-treated lumber for the foundation and framing to resist rot and insect damage. Consider using thicker lumber than minimally required for enhanced strength and longevity. For the roof, choose asphalt shingles for their affordability and weather resistance. Don't skimp on screws and fasteners; using galvanized or stainless steel will ensure they withstand the elements. Pre-planning your materials list, including quantities, will help you avoid costly delays during construction.

Construction: Building a Solid Structure

With your materials gathered and the ground prepared, you can begin the actual construction. This process typically involves several key stages. First, construct the foundation. This could be a simple concrete slab, a gravel base, or even pressure-treated lumber skids, depending on your budget and the ground conditions. Next, erect the floor joists, ensuring they are level and properly spaced. Then, build the walls, paying close attention to squareness and plumbness. Use strong corner bracing to ensure stability. After the walls are complete, install the roof trusses or rafters, followed by the sheathing and roofing material. This sequence ensures the structural integrity of your shed.

Essential Tools for the Job

To successfully construct your shed, you'll need a range of tools. Essential tools include:

  • Measuring tape
  • Level
  • Shovel
  • Post-hole digger (if using posts)
  • Circular saw
  • Drill with various drill bits
  • Screwdriver bits
  • Hammer
  • Safety glasses
  • Work gloves

Remember safety first! Always wear appropriate safety gear and follow all manufacturer's instructions for your tools and materials.

Finishing Touches: Adding the Finishing Touches

Once the main structure is complete, add the finishing touches to create a functional and attractive shed. Install a sturdy door, ensuring it's properly aligned and securely fastened. Consider adding windows for ventilation and natural light. Paint or stain the exterior to protect the wood and enhance the aesthetics. Finally, clean up the construction site, leaving it neat and tidy. This final step demonstrates pride in your workmanship and ensures a safe and pleasant environment around your new storage shed.

Building an 8x12 storage shed is a manageable project with significant rewards. By following these detailed plans and prioritizing quality materials and careful construction, you will create a strong, reliable, and long-lasting storage solution for years to come. Enjoy the process and the satisfaction of completing this worthwhile project!

Share:

How to Save Money on Your 6x8 Shed Build: Plans and Cost Tips

How to Save Money on Your 6x8 Shed Build: Plans and Cost Tips

How to Save Money on Your 6x8 Shed Build: Plans and Cost Tips

Constructing a 6x8 shed offers a practical solution for additional storage or workshop space. However, the costs associated with such a project can quickly escalate if careful planning and budgeting are not implemented. This comprehensive guide provides a detailed breakdown of strategies to minimize expenses without compromising the quality and durability of your shed.

I. Planning and Design: Laying the Foundation for Savings

Before commencing any construction, meticulous planning is crucial for cost-effectiveness. A well-defined plan minimizes material waste, reduces labor costs, and prevents costly mistakes during the build process.

A. Selecting the Right Shed Design

Opting for a simple, rectangular design minimizes material usage and construction complexity compared to more elaborate structures. Avoid intricate rooflines or oversized doors, which increase both material and labor costs. Consider pre-fabricated shed kits â€" although they may have a higher upfront cost, the standardized design often leads to fewer material errors and faster assembly times. Carefully assess your specific storage needs to determine the appropriate size. A 6x8 shed may suffice for many needs; building larger than necessary leads to unnecessary expenses.

B. Material Sourcing and Selection

Material costs constitute a significant portion of the overall budget. Careful sourcing and material selection are paramount.

  • Consider Recycled or Reclaimed Materials: Explore options like reclaimed lumber from demolition sites or salvage yards. While requiring more time and effort to acquire, these materials can significantly reduce expenses.
  • Buy in Bulk: Purchasing materials in bulk often results in lower per-unit costs. However, carefully calculate your exact needs to avoid overspending on surplus materials.
  • Negotiate Prices: Don't hesitate to negotiate prices with lumber yards or suppliers. Especially for large orders, they may be willing to offer discounts.
  • Shop Around: Compare prices from various suppliers before making any purchases. Prices can vary significantly between retailers.
  • Choose Economical Materials Wisely: While using high-quality materials is essential for longevity, consider using pressure-treated lumber for the foundation and floor framing, which are prone to ground contact and moisture. For the walls and roof, opt for materials that balance affordability and structural integrity. For example, using less expensive plywood sheathing for the walls instead of solid wood panels can significantly reduce costs.

C. Detailed Plans and Drawings

Creating detailed plans and drawings, even for a simple 6x8 shed, helps avoid costly mistakes and material waste. These plans should include precise measurements, material lists, and assembly instructions. Consider using free online shed plan resources, but ensure they align with your local building codes and your desired design.

II. Construction Techniques and Labor Costs

Labor costs can significantly inflate the overall project expenses. Strategically managing labor can lead to substantial savings.

A. DIY Approach

Undertaking the project yourself is the most effective way to reduce labor costs. However, this approach requires time, skill, and the availability of necessary tools. If your skillset is limited, start with smaller projects to gain experience before tackling a shed construction.

B. Utilizing Available Resources

If undertaking a DIY approach, tap into free resources. There is a wealth of information available online, including tutorials, videos, and detailed instructions. This helps minimize reliance on paid consultants or contractors.

C. Seeking Assistance Strategically

If undertaking a DIY approach, consider seeking help from friends or family members for specific tasks that require multiple hands or specialized skills, such as lifting heavy materials. This significantly cuts down on the cost of hiring professionals for simple tasks.

D. Prioritizing Tasks

Prioritize tasks to minimize material waste and maximize efficiency. For example, complete the foundation and framing before purchasing and installing the siding or roofing materials. This method prevents material damage and reduces the likelihood of ordering additional materials due to errors during the building process.

III. Minimizing Unexpected Costs

Unforeseen expenses can easily derail even the most meticulously planned project. Proactive measures can help mitigate these risks.

A. Building Permits and Inspections

Check with your local authorities regarding building permit requirements and inspection fees. These costs vary depending on location and project complexity. Factoring these costs into your initial budget is critical.

B. Site Preparation

Adequate site preparation is crucial. Clearing the site of debris and ensuring level ground minimizes complications during the construction phase. Using a simple level to ensure a level foundation will prevent issues later in the construction process and eliminate the need for additional remedial work.

C. Tool Rental vs. Purchase

Assess the necessity of purchasing tools versus renting them. For tools that you'll only use once, renting is more cost-effective. For tools that you anticipate using repeatedly, purchasing might be a more financially sound long-term decision.

D. Contingency Fund

Always include a contingency fund in your budget to accommodate unforeseen expenses. This buffer prevents financial strain if unexpected issues arise during construction. A realistic contingency is typically 10-15% of the estimated total cost.

IV. Long-Term Cost Considerations

While initial savings are important, consider long-term cost implications. Investing in high-quality materials, even if more expensive upfront, often translates to reduced maintenance and repair costs over the lifespan of the shed.

A. Durable Materials

Prioritizing durable materials in key areas, such as the foundation and roof, minimizes the need for future repairs. This long-term cost-saving strategy outweighs slightly higher initial expenses.

B. Proper Maintenance

Regular maintenance, including painting or staining the exterior and addressing any minor repairs promptly, helps prolong the life of your shed and prevents costly repairs down the line. A small investment of time and resources in regular maintenance will save money in the long run.

By implementing these strategies, you can significantly reduce the overall cost of building your 6x8 shed without sacrificing quality or durability. Careful planning, resourcefulness, and a proactive approach to potential challenges will ensure a successful and cost-effective project.

Share:

Transform Your Yard with 12x20 Shed Plans Featuring a Loft

Transform Your Yard with 12x20 Shed Plans Featuring a Loft

Transform Your Yard with 12x20 Shed Plans Featuring a Loft

The addition of a shed to one's property often signifies more than just extra storage space; it represents an extension of living space, a personalized workshop, or a quiet retreat. A well-designed shed can seamlessly integrate with the existing landscape, enhancing both functionality and aesthetic appeal. This article delves into the comprehensive design considerations and construction aspects of a 12x20 shed incorporating a loft, offering a detailed blueprint for transforming your yard into a more organized and versatile outdoor haven.

I. Planning and Design: Laying the Foundation for Your 12x20 Shed with Loft

Before embarking on the construction process, meticulous planning is paramount. This phase encompasses site selection, design conceptualization, material sourcing, and obtaining necessary permits. Careful consideration at this stage ensures a smooth and efficient build, minimizing potential complications down the line.

A. Site Selection and Assessment

The location of your shed significantly impacts its usability and overall aesthetic integration with your property. Factors to consider include:

  • Accessibility: Ensure easy access for deliveries and future maintenance.
  • Sunlight and Shade: Balance the need for natural light with the avoidance of excessive heat buildup.
  • Drainage: Select a site with proper drainage to prevent water accumulation around the shed's foundation.
  • Utilities: Proximity to existing power sources, if electrical connections are desired, is crucial.
  • Local Regulations: Consult local building codes and homeowner's association rules regarding shed placement and size restrictions.

B. Design Considerations: Optimizing Space and Functionality

A 12x20 shed offers considerable space, allowing for a versatile design incorporating a loft. Careful consideration of the following design aspects is crucial:

  • Loft Access: Plan for a safe and convenient access point to the loft, whether it's a fixed staircase, a pull-down ladder, or a spiral staircase.
  • Headroom: Ensure adequate headroom in both the main floor and loft areas for comfortable movement.
  • Storage Solutions: Incorporate shelving, cabinets, and workbenches to maximize storage and organization within the shed.
  • Ventilation: Adequate ventilation is essential to prevent moisture buildup and maintain a comfortable interior environment. Consider windows, vents, and gable vents.
  • Insulation: If intended for year-round use, insulation should be incorporated to regulate temperature and improve energy efficiency.

C. Material Selection: Ensuring Durability and Aesthetics

The selection of materials directly impacts the shed's longevity and aesthetic appeal. Popular options include:

  • Wood: Offers a classic look and allows for customization, but requires regular maintenance.
  • Metal: Highly durable and low-maintenance, offering excellent protection against the elements.
  • Vinyl: Provides a long-lasting, low-maintenance option with various color choices.

The choice will depend on budget, desired aesthetic, and local climate conditions.

II. Construction Process: Building Your 12x20 Shed with Loft

The construction process involves several key stages, from foundation preparation to final finishing touches. Adhering to proper building techniques is crucial for structural integrity and longevity.

A. Foundation Preparation: Establishing a Solid Base

A stable foundation is critical for preventing settling and ensuring the shed's longevity. Options include:

  • Concrete Slab: Provides a robust and level base, ideal for heavier sheds.
  • Gravel Base: A more cost-effective option, suitable for lighter sheds in well-drained areas.
  • Pier and Beam Foundation: A good option for uneven terrain, providing support while allowing for air circulation.

The chosen foundation must be appropriately sized and leveled to accommodate the shed's dimensions and weight.

B. Framing and Wall Construction: Building the Shed's Structure

The framing forms the skeleton of the shed. Precise measurements and proper connections are essential for structural integrity. This stage involves:

  • Framing the Floor: Constructing the floor joists and decking, ensuring a level and stable platform.
  • Framing the Walls: Erecting the wall studs, ensuring proper spacing and bracing.
  • Roof Framing: Constructing the roof trusses or rafters, ensuring proper slope and support.
  • Sheathing: Applying sheathing to the walls and roof, providing a surface for the exterior cladding.

C. Exterior Cladding and Roofing: Protecting Your Investment

The exterior cladding and roofing protect the shed from the elements. This stage involves:

  • Installing Siding: Applying the chosen siding material, ensuring proper overlap and sealing to prevent water ingress.
  • Roofing Installation: Installing the roofing material, ensuring proper slope and sealing to prevent leaks.
  • Gutter and Downspout Installation: Installing gutters and downspouts to direct rainwater away from the shed's foundation.

D. Interior Finishing: Creating a Functional and Appealing Space

The interior finishing transforms the shed into a usable space. This includes:

  • Loft Construction: Building the loft floor and ensuring safe access.
  • Insulation and Drywall: Insulating the walls and ceilings, followed by drywall installation.
  • Painting and Finishing: Painting the walls and trim, adding any desired finishing touches.
  • Electrical and Plumbing (if applicable): Installing electrical wiring and plumbing as needed, ensuring adherence to all safety codes.

III. Conclusion: Enjoying Your New Outdoor Haven

Constructing a 12x20 shed with a loft is a rewarding project that significantly enhances the functionality and aesthetic appeal of your property. By carefully planning, selecting appropriate materials, and adhering to proper construction techniques, you can create a versatile and durable structure that serves your needs for years to come. Remember to prioritize safety throughout the construction process and consult professionals when necessary. The end result â€" a personalized and functional outdoor space â€" is well worth the effort.

Share: