How to Build a Basic Shed for Your Backyard in Just a Weekend

How to Build a Basic Shed for Your Backyard in Just a Weekend

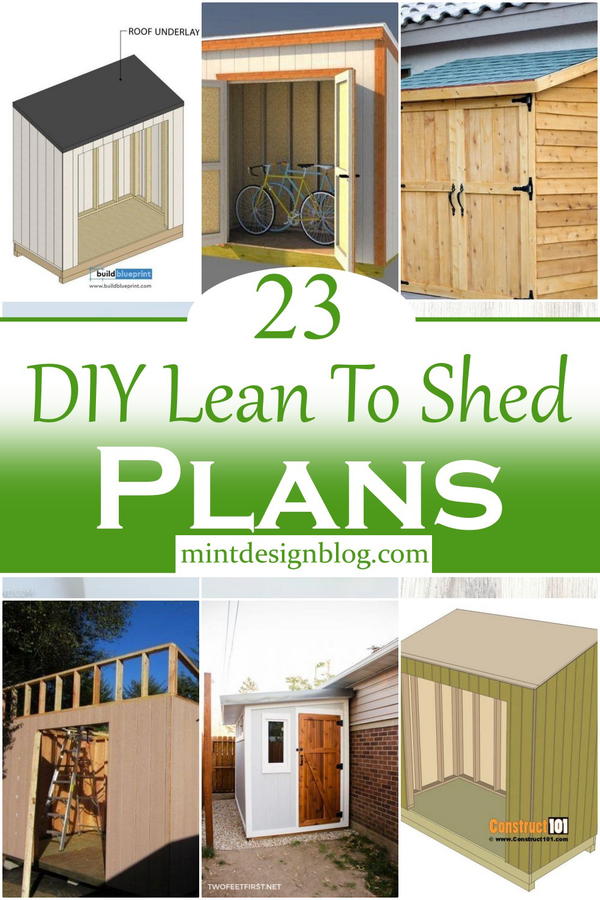
Conquer Your Clutter: Build a Basic Backyard Shed in a Weekend

Tired of tripping over garden tools and overflowing storage bins? A backyard shed offers the perfect solution, and building a basic one isn't as daunting as you might think. With a weekend and a little elbow grease, you can transform your chaotic backyard into an organized haven. This guide provides a detailed, step-by-step plan to get you started. Prepare for a rewarding project that will add both functionality and value to your property!

Planning Your Shed Project

Before you even touch a hammer, meticulous planning sets you up for success. First, decide on the size and style of your shed. Consider your storage needsâ€"how much space do you require for tools, lawn equipment, and other items? Sketch a simple design on paper, noting the dimensions. Next, check your local building codes. Many jurisdictions require permits for structures exceeding a certain size, and understanding these regulations will prevent headaches later. Finally, procure all necessary materials. Create a comprehensive shopping list, including lumber (pressure-treated is recommended for longevity), roofing materials, screws, nails, and any other hardware you'll need. Don't forget to factor in the cost of concrete for the foundation â€" a firm base is crucial for a stable shed.

Laying the Foundation: A Solid Start

Preparing the Ground

Begin by clearing the chosen location of any debris, vegetation, and loose soil. Level the ground carefully using a shovel and a level. This ensures the shed sits evenly and prevents settling issues down the line. For a simple foundation, you can use concrete blocks or a poured concrete slab. Mark out the dimensions of your shed's base on the ground to guide your work.

Setting the Concrete Blocks (or Pouring the Slab)

If using concrete blocks, arrange them according to your measurements, ensuring they’re level using a spirit level. For a poured concrete slab, build a formwork using plywood and stakes. Pour the concrete, ensuring it's evenly distributed and level. Allow ample time for the concrete to fully cure â€" usually 24-48 hours â€" before proceeding.

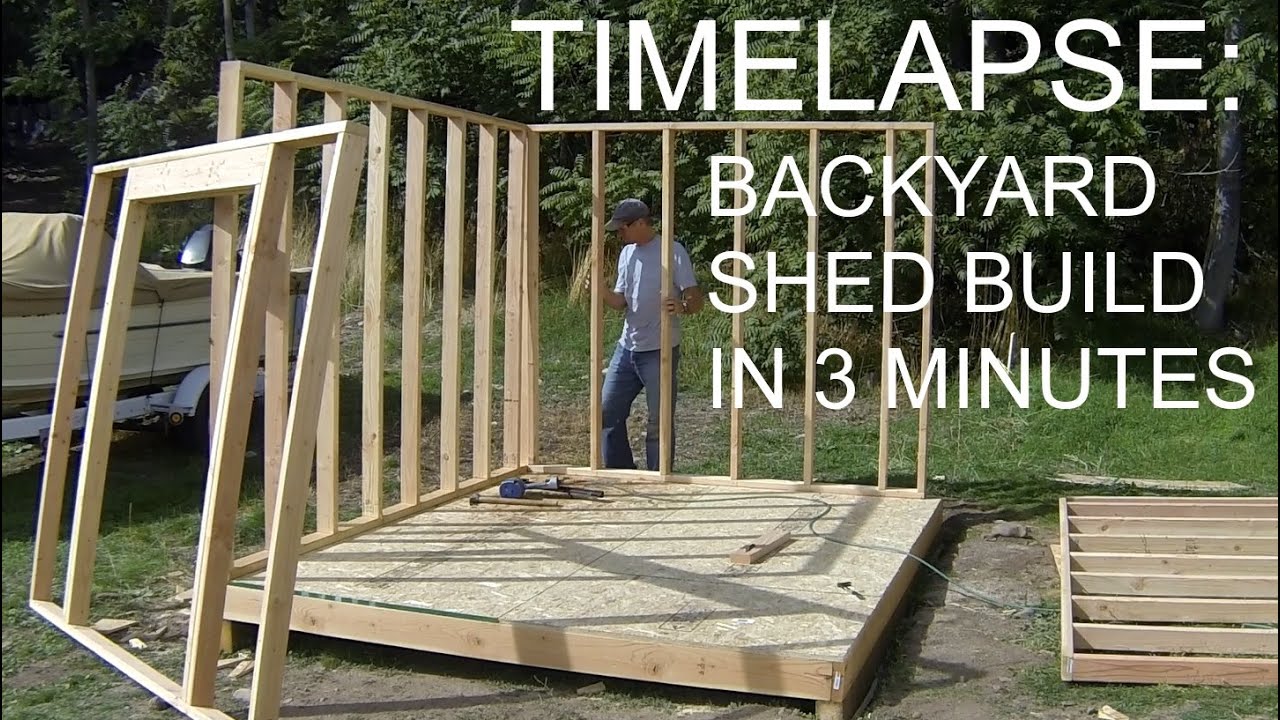
Framing the Shed: Building the Skeleton

Once the foundation is solid, you can begin building the frame. Cut the pressure-treated lumber according to your design plans. Begin by assembling the floor frame, securing the lumber with appropriate screws and ensuring squareness at each corner. Then, construct the wall frames, attaching them to the floor frame. Ensure all joints are secure and use a level to check verticality throughout the process. Remember: accuracy in this stage is critical for a structurally sound shed.

Roofing and Siding: Adding the Finishing Touches

With the frame complete, you can move on to roofing. Choose a roofing material that suits your budget and aesthetic preferences â€" asphalt shingles are a popular and cost-effective choice. Attach the roofing material according to the manufacturer's instructions, ensuring proper overlapping for watertight protection. Finally, install the siding, protecting your shed from the elements. Consider using materials like vinyl or metal for their durability and low maintenance.

Adding the Finishing Touches: Doors and Windows

Install a door and any windows according to your design. Choose robust hinges and secure locking mechanisms for security. Consider adding a window for natural light and ventilation. Once the doors and windows are in place, you can add any finishing touches, such as painting or staining the shed to your liking. This final step adds a personalized touch and protects your wood from the elements.

Essential Tools for Your Shed Building Project

Before you start, gather these essential tools:

  • Measuring tape
  • Level
  • Shovel
  • Hammer
  • Drill with various drill bits
  • Screwdriver
  • Saw (circular saw or hand saw)
  • Safety glasses
  • Work gloves

Building a basic shed is a rewarding DIY project that dramatically improves your backyard organization. By carefully following these steps and prioritizing safety, you can enjoy your newly built shed in just a weekend! Remember to always prioritize safety by wearing appropriate safety gear throughout the project.

Share:

Create a Beautiful and Functional Wood Pallet Shed for Your Yard

Create a Beautiful and Functional Wood Pallet Shed for Your Yard

Create a Beautiful and Functional Wood Pallet Shed for Your Yard

Hey there, fellow DIY enthusiasts! So you're thinking about building a shed, huh? Fantastic! But maybe you're on a budget, want a project that's both rewarding and looks great, and maybe, just maybe, you're a little obsessed with the rustic charm of reclaimed wood. Well, friend, you've come to the right place. Let's talk about building a stunning, functional wood pallet shed for your yard!

Why Choose a Pallet Shed?

Before we dive into the nitty-gritty, let's talk about why a pallet shed is such a fantastic idea. First and foremost: cost. Pallet wood is incredibly affordable, often free if you know where to look (more on that later!). Second: sustainability. Repurposing pallets gives these discarded materials a new life, reducing waste and lessening your environmental footprint. Third: rustic charm. There's just something undeniably appealing about the weathered, textured look of reclaimed wood. And finally: DIY satisfaction. Building your own shed is incredibly rewarding, and the sense of accomplishment is unparalleled.

Planning Your Pallet Shed: Size and Design

Before you even think about grabbing a hammer, you need a plan. Start by considering the size. How much storage space do you need? Are you planning on storing garden tools, lawnmowers, bikes, or something else entirely? Think about the dimensions carefully. A small shed might suffice for simple storage, while a larger one might be needed for more extensive needs. Sketch out a rough design, even a simple one on a napkin, to get a visual idea of your project.

Choosing Your Pallet Wood

Now for the fun part: sourcing your pallets! Many businesses, like grocery stores and construction sites, discard pallets regularly. Ask around â€" you might be surprised at how willing people are to give them away. Just make sure to check for any markings indicating the wood has been treated with chemicals that might be harmful. Look for heat-treated pallets (HT), which are safe for outdoor use. Avoid using pallets marked with MB (methyl bromide), as this is a dangerous pesticide.

Once you have your pallets, inspect them carefully. Discard any that are damaged beyond repair. Remember, you'll be working with these materials for the entire construction process, so selecting quality materials goes a long way.

Construction: A Step-by-Step Guide

Okay, let's get building! This is a simplified guide, and specifics will depend on your design and the size of your shed. Always prioritize safety and use appropriate safety gear, including gloves, safety glasses, and sturdy work boots.

Foundation

You'll need a solid foundation. A simple concrete slab is ideal, but you can also use pressure-treated lumber for a more budget-friendly option. Ensure your foundation is level and large enough to support your shed.

Framing

Disassemble your pallets carefully. You'll want to use the stronger, more intact boards for your framing. Construct a basic frame for the walls, using screws or nails to join the boards. Consider reinforcing the corners with extra bracing. Make sure everything is square and plumb before moving on.

Walls and Roof

Once the frame is complete, begin attaching the pallet boards to create the walls. You can use the entire pallet sections or individual boards, depending on your design preference. For the roof, you'll need to create a frame that will support the weight of the roofing material. A simple gable roof is a good option for beginners. Use sturdy boards and add extra support to ensure its strength.

Roofing

There are several options for roofing your shed. Tar paper followed by metal roofing will create a watertight and durable structure. If you're going for a more rustic look, consider using overlapping wood shingles, but ensure you use waterproof sealant to protect against the elements.

Door and Windows

Cut an opening for the door using a circular saw, ensuring a snug fit. You can create a simple door using additional pallet wood or purchase a pre-made door. If you want windows, you can either cut openings and install pre-made windows or get creative and use repurposed glass panes. Remember to apply weatherstripping to maintain the shed's weatherproofing.

Finishing Touches

Once your shed is built, it's time to add the finishing touches. Consider applying a sealant or stain to protect the wood from the elements and enhance its appearance. You can also add a padlock for security. Let your creativity shine! Add some personalized touches, like a small porch or a decorative trim. Remember that a well-painted shed can dramatically transform its aesthetic appeal.

Tips and Tricks

  • Clean your pallets thoroughly: Remove any dirt, debris, or nails before using them.
  • Pre-drill holes: This will prevent the wood from splitting when you screw or nail it together.
  • Use galvanized screws or nails: These will resist rust and last longer.
  • Level your foundation carefully: A level foundation is crucial for a stable shed.
  • Work with a helper: Building a shed is easier with an extra set of hands.
  • Take your time: Don't rush the process. Accuracy is key to a sturdy, well-built shed.
  • Commonly Asked Questions

    Q: How long does it take to build a pallet shed?

    A: The time it takes depends on the size and complexity of your design, but expect to spend several days, perhaps even a week or two, depending on your pace and experience.

    Q: What tools do I need?

    A: You'll need basic tools like a hammer, saw (circular saw recommended), screwdriver, measuring tape, level, and safety glasses. Other tools like a nail gun or drill will speed up the process.

    Q: How much does it cost to build a pallet shed?

    A: The cost can be minimal if you source free pallets. Your main expenses will be for the foundation materials, roofing, and any additional hardware.

    Q: How durable is a pallet shed?

    A: With proper construction and weatherproofing, a pallet shed can be quite durable. The lifespan will depend on the quality of the wood and the climate.

    Q: Do I need a permit to build a shed?

    A: Building codes vary by location, so check with your local authorities to see if you need a permit. Generally speaking, smaller sheds often don't require permits, but it’s always best to confirm.

    There you have it! Building a beautiful and functional wood pallet shed is a totally achievable project. With a little planning, some elbow grease, and a dash of creativity, you'll have a fantastic new addition to your yard in no time. Happy building!

    Share:

    DIY Lean-To Shed Build: A Perfect Solution for Every Backyard

    DIY Lean-To Shed Build: A Perfect Solution for Every Backyard

    DIY Lean-To Shed Build: A Perfect Solution for Every Backyard

    Tired of clutter piling up in your garage or overflowing from your existing shed? Yearning for extra storage space without breaking the bank or hiring expensive contractors? Then building your own lean-to shed is the perfect solution! This versatile structure provides ample storage, adds charm to your backyard, and empowers you with the satisfaction of a DIY project well-executed. We’ll guide you through each step, from planning to the final touches, making this project achievable even for novice DIYers. Prepare to transform your outdoor space!

    Planning Your Lean-To Shed: Laying the Foundation for Success

    Before you grab your tools, meticulous planning forms the bedrock of a successful lean-to shed construction. Begin by determining the ideal location. Consider proximity to existing structures (like a house or garage) for easy access and potential utility connections. Then, measure the available space carefully, noting any obstructions like trees or utility lines. Next, sketch a detailed plan, including the desired dimensions (length, width, and height), materials list, and a layout of the door and any windows. This plan will serve as your roadmap throughout the entire building process. You'll also want to check local building codes and obtain any necessary permits. This vital step ensures your project complies with regulations and avoids potential complications down the line. Finally, create a detailed materials list, buying everything at once to avoid delays.

    Gathering Your Arsenal: Essential Materials and Tools

    Building your lean-to shed requires a range of materials and tools. Don't underestimate the importance of having everything prepared beforehand. For the frame, you’ll need pressure-treated lumber (for durability and weather resistance) in various sizes, including 4x4 posts for the foundation, 2x4s for the walls and roof supports, and 2x6s for the rafters. For roofing, consider durable materials such as asphalt shingles, metal roofing, or polycarbonate panels, depending on your budget and aesthetic preferences. You'll also need hardware such as screws, nails, and fasteners. Don't forget concrete for the foundation (unless using an alternative such as gravel), weatherproofing materials (for sealing and protecting your shed), and a sturdy door along with its necessary hardware. Regarding tools, gather a measuring tape, level, saw (circular saw or hand saw), drill, post hole digger (or auger), shovel, hammer, and safety gear such as safety glasses and work gloves.

    Essential Tool Checklist:

    • Measuring Tape
    • Level
    • Circular Saw or Hand Saw
    • Drill
    • Post Hole Digger or Auger
    • Shovel
    • Hammer
    • Safety Glasses
    • Work Gloves

    Construction: Bringing Your Lean-To Shed to Life

    With your plan and materials ready, you can begin construction. Start by digging post holes for the foundation posts, ensuring they are level and plumb. Set the posts in concrete, allowing ample time for the concrete to fully cure. Once the concrete is cured, construct the frame using 2x4s, carefully measuring and securing each piece. Next, build and attach the roof supports, making sure the rafters are properly spaced and secured. Install the roofing material, following the manufacturer’s instructions. Remember to consider appropriate overhangs to protect the walls from rain. Then, install the door and any windows you’ve chosen. Finish by applying weatherproofing sealant to all joints and exposed edges for extra protection. Finally, consider adding a coat of paint or stain for aesthetics and further protection from the elements.

    Finishing Touches and Enjoying Your New Space

    Once the structure is complete, add personal touches to make your lean-to shed truly your own. You might consider adding shelves for organization, installing a workbench for DIY projects, or even running electricity for lighting and power tools. Remember to keep your shed tidy and organized. Regular maintenance, including inspecting for any damage and applying fresh sealant when needed, will prolong the life of your shed. Now, step back and admire your handiwork! Enjoy the extra storage and newfound organization â€" and the immense satisfaction of a DIY project completed.

    Share:

    Wood Pallet Shed: A Creative Way to Add Outdoor Storage Without Breaking the Bank

    Wood Pallet Shed: A Creative Way to Add Outdoor Storage Without Breaking the Bank

    Wood Pallet Shed: A Creative Way to Add Outdoor Storage Without Breaking the Bank

    Tired of cluttered garages and overflowing tool sheds? Yearning for a stylish and functional outdoor storage solution that doesn't drain your bank account? Look no further than the humble wood pallet! These readily available, often free, materials offer a surprisingly versatile foundation for building a charming and practical shed. This article explores the exciting possibilities of constructing your own wood pallet shed, highlighting the design considerations, construction steps, and rewarding results of this budget-friendly project.

    Planning Your Pallet Shed: Size, Style, and Location

    Before you dive into the construction process, careful planning ensures a successful outcome. First, determine the ideal size for your shed based on your storage needs. Consider the dimensions of the pallets you'll be using; standard pallets typically measure around 48 inches by 40 inches. This will dictate the overall footprint of your structure. Next, choose a design style. Will your shed be a rustic masterpiece showcasing the natural wood, or will you paint it a vibrant color to complement your outdoor décor? Finally, carefully select the location. Ensure the ground is level and consider factors like sunlight, proximity to power sources (if needed for lighting or electricity), and ease of access. Proper planning prevents frustrating setbacks down the line.

    Gathering Your Materials and Tools

    Once you've finalized your design, gather the necessary materials. Besides the reclaimed wood pallets, you'll need additional lumber for framing, roofing, and supports. Consider pressure-treated lumber for longevity, especially for the base and framing. For roofing, options range from inexpensive corrugated metal sheeting to more aesthetically pleasing asphalt shingles. Don't forget hardware, including screws, nails, hinges, a latch, and any necessary weatherproofing materials. The tool list includes a circular saw, hammer, drill, level, measuring tape, and safety glasses. Always prioritize safety when working with power tools.

    Sourcing Free or Low-Cost Pallets

    The beauty of this project lies in its affordability. Many businesses, such as grocery stores, construction sites, and even some breweries, regularly dispose of pallets. Contact local businesses and inquire about obtaining discarded pallets. Inspect them carefully for damage or rot before using them. A little pre-planning in this step can dramatically reduce your project cost.

    Constructing Your Pallet Shed: Step-by-Step Guide

    The construction process begins with building a sturdy base. Create a level foundation using concrete blocks, treated lumber, or even compacted gravel. Then, assemble the pallet walls. Secure the pallets together using screws and reinforcing lumber where needed. Construct the roof frame using additional lumber, ensuring it's strong enough to support the chosen roofing material. Attach the roofing, and finally, add the door and any desired windows. Remember to regularly check for squareness and levelness throughout the building process. A plumb bob or level will help greatly in this process.

    Tips for Success

    To ensure a long-lasting and attractive shed, consider these extra steps:

    • Clean and sand the pallets to remove debris and splinters before assembly.
    • Apply a weatherproofing sealant to protect the wood from moisture and decay.
    • Add decorative elements such as flower boxes or a small window to personalize your shed.

    Enjoy Your New Outdoor Storage Solution!

    With a little planning and effort, you can transform discarded wood pallets into a functional and attractive outdoor storage shed. Enjoy the satisfaction of creating something beautiful and useful while saving money. Your newly built pallet shed provides a practical solution for storing gardening tools, outdoor furniture, or seasonal items, keeping your yard organized and clutter-free. It's a testament to the power of creativity and resourcefulness!

    Share:

    Affordable 10x12 Pallet Shed Plans for Outdoor Enthusiasts

    Affordable 10x12 Pallet Shed Plans for Outdoor Enthusiasts

    Affordable 10x12 Pallet Shed Plans for Outdoor Enthusiasts

    Hey there, fellow outdoor adventurers! So, you're dreaming of a dedicated space to store all your gear â€" that mountain bike, the kayak you swear you'll use more often, those hiking boots that have seen better days (but are sentimental!), and maybe even a cozy spot to escape for a quiet moment? Building your own shed is a fantastic way to achieve this, and guess what? It doesn't have to break the bank! Using reclaimed pallets is a budget-friendly, eco-conscious approach, and a 10x12 size gives you ample room to work with. Let's dive into these awesome pallet shed plans!

    Why Choose a Pallet Shed?

    Before we get into the nitty-gritty, let's talk about why building with pallets is such a smart move. First off, it's seriously cheap. You can often find free or very inexpensive pallets from local businesses (think construction sites, breweries, or even your friendly neighborhood grocery store!). Secondly, it's eco-friendly â€" you're giving these discarded materials a new life, reducing waste and landfill contributions. Plus, the rustic, reclaimed-wood aesthetic is totally on-trend and adds a charming touch to your outdoor space.

    Now, let's be realistic. Pallet wood isn't perfect. It might have some imperfections, and you'll need to carefully inspect each pallet for rot, nails, or other damage. But with a little patience and some careful planning, you can overcome these challenges and create a truly amazing shed.

    Planning Your 10x12 Pallet Shed

    Building anything requires a solid plan. This isn’t some slapdash project; we want a sturdy, functional shed! Here’s what you’ll need to consider:

    Location, Location, Location!

    First, choose your shed’s spot. Think about access, sunlight, proximity to power (if you plan on adding electricity), and drainage. Check local building codes and HOA regulations before you even start gathering materials!

    Material Gathering

    This is where the fun (and the scavenging) begins! You'll need a significant number of pallets for a 10x12 shed. Aim for pallets that are in relatively good condition, free of significant rot or pest damage. You’ll also need:

    • Concrete or gravel for the base
    • Post hole diggers or a power auger (if you're building a more substantial base)
    • Concrete mix or gravel
    • Screws (exterior-grade are a must!)
    • Hammer
    • Saw (circular saw or hand saw)
    • Measuring tape
    • Level
    • Safety glasses and gloves
    • Optional: Roofing materials (tar paper, metal sheeting, shingles)

    Foundation Options

    You've got a few choices here, depending on your budget and the ground conditions:

    • Gravel Base: The simplest and cheapest option. Level the ground, lay down a layer of gravel, and build your shed directly on top. This is suitable for lighter sheds and well-drained soil.
    • Concrete Slab: More durable and provides a level foundation, but requires more materials and effort. It's ideal for heavier sheds and areas with poor drainage.
    • Wooden Frame Foundation: This option involves constructing a frame from pressure-treated lumber and setting it on concrete piers or directly in the ground (if treated appropriately). Provides a good balance between cost and durability.

    Construction Steps (Simplified!)

    Now for the building part! This is a simplified overview; detailed instructions are beyond the scope of this article. However, these steps will get you started:

    1. Prepare the base: Level the ground and build your chosen foundation. Ensure it's completely level before proceeding.
    2. Assemble the walls: This is where you'll be working with your pallets. You might need to dismantle some pallets and reassemble them to create the desired wall height and structure. Consider adding bracing for extra strength.
    3. Connect the walls: Carefully join the walls, making sure they're square and plumb. Use screws liberally to ensure stability. Don't be afraid to add extra support where needed.
    4. Construct the roof: The roof design depends on your preference and materials. A simple gable roof is usually easiest for a beginner. You can use additional pallets, plywood, or other suitable roofing materials.
    5. Add finishing touches: This includes adding a door (consider using a pre-made door or creating one from pallets), windows (if desired), and any interior shelving or storage solutions.
    6. Roofing (If Needed): Install your chosen roofing material, ensuring proper water runoff.

    Making it Your Own: Customization Ideas

    Don’t just build a shed; build *your* shed! Here are some ideas to personalize your 10x12 pallet haven:

    • Add a workbench: Perfect for repairs, crafting, or prepping for your next adventure.
    • Install shelves: Maximize storage space for all your gear.
    • Add a window: Let in some natural light.
    • Paint or stain the pallets: Protect the wood and personalize the look.
    • Install a lockable door: Keep your precious gear safe.
    • Add electricity: A great addition for lighting, power tools, or even a small space heater.

    Safety First!

    Remember, safety is paramount. Always wear safety glasses and gloves when working with pallets and tools. Be mindful of hidden nails and splinters. If you're unsure about any aspect of the construction, don't hesitate to seek help from someone experienced in DIY projects.

    Commonly Asked Questions

    Here are some questions I often get about building pallet sheds:

    Q: How long does it take to build a pallet shed?

    A: This depends on your experience and how much help you have. A simple shed could take a weekend, while a more elaborate one might take several weeks.

    Q: Do I need building permits?

    A: Check with your local authorities. Building permits are often required, especially for structures of a certain size.

    Q: How do I treat the pallet wood?

    A: Inspect each pallet carefully for rot or pests. Consider sanding down rough edges and applying a weather-resistant sealant or stain to protect the wood from the elements.

    Q: Can I use any type of pallet?

    A: Avoid pallets marked with an "HT" stamp (heat treated) because they may contain chemicals that are unsafe. Look for pallets marked "MB" (methyl bromide free) or those from reputable sources where you know the treatment history. Inspect carefully for signs of rot or damage.

    Q: What kind of roof is best?

    A: A simple gable roof is usually the easiest to build for beginners. Consider the climate and choose a roofing material that's suitable for your area.

    There you have it! With a little planning, effort, and creativity, you can build a fantastic, affordable, and personalized 10x12 pallet shed. Happy building, and happy adventures!

    Share:

    The Easiest Lean-To Shed Build You’ll Ever Complete

    The Easiest Lean-To Shed Build You’ll Ever Complete

    The Easiest Lean-To Shed Build You’ll Ever Complete

    Tired of cluttered garages and overflowing storage spaces? Dreaming of a simple, affordable solution to your storage woes? Then prepare to be amazed! This guide walks you through building the easiest lean-to shed you’ll ever complete, a project perfect for weekend warriors with minimal construction experience. We'll break down each step with clear, concise instructions, leaving you with a functional and aesthetically pleasing addition to your property.

    Planning Your Perfect Lean-To

    Before you grab your tools, careful planning is key. First, choose your location. Consider proximity to power, water access (if needed for future modifications), and the overall aesthetic. Ensure you have adequate space and comply with any local building codes or HOA regulations. Next, determine the dimensions. A smaller shed, say 6ft x 8ft, is perfectly manageable for a first-time builder. Larger structures demand more advanced carpentry skills and materials. Finally, sketch a simple design. This doesn’t need to be architecturally perfect; a basic drawing outlining the dimensions and key features will suffice. Consider the materials â€" pressure-treated lumber is highly recommended for its weather resistance.

    Gathering Your Supplies

    With your plan finalized, gather the necessary supplies. This list provides a starting point; adjust quantities based on your shed's dimensions. Remember to always buy slightly more than you need to account for mistakes or unforeseen circumstances. You’ll need:

    • Pressure-treated lumber (4x4 posts for supports, 2x4s for framing, 2x6s for rafters and roof supports, and plywood for the walls and roof)
    • Concrete mix for post bases (or use existing concrete if available)
    • Roofing felt or other suitable roofing material
    • Nails or screws (exterior-grade galvanized are recommended)
    • Level
    • Measuring tape
    • Shovel
    • Post hole digger (optional, but helpful)
    • Circular saw or hand saw
    • Hammer or drill/driver

    Step-by-Step Construction

    Setting the Posts

    Begin by digging holes for your support posts. Ensure the holes are deep enough for stability and filled with concrete. Level the posts carefully using a level to ensure a structurally sound foundation. Allow the concrete to fully cure before proceeding â€" this is crucial for the shed's stability.

    Framing the Walls

    Attach the 2x4s to form the side and back walls, ensuring they are plumb and square. Use your level frequently. This stage involves basic carpentry skills like measuring, cutting, and nailing or screwing. Take your time and ensure every piece is securely attached.

    Constructing the Roof

    The roof is the simplest part. Attach the rafters to the top of your wall framing, creating the desired lean-to angle. Ensure the rafters are evenly spaced and securely fastened. Once the rafters are in place, attach the plywood sheathing to create a solid roof surface.

    Finishing Touches

    Apply roofing felt or your chosen roofing material. Add any desired siding (optional). Remember, this is a basic shed, so don't overcomplicate it! Finally, you can choose to paint or stain the shed to match your existing structures or add a personal touch.

    Enjoy Your New Lean-To Shed!

    Congratulations! You’ve successfully built your very own lean-to shed. With minimal effort and cost, you've added valuable storage space to your property. Remember to regularly maintain your shed, ensuring the roof is intact and the structure is sound to extend its lifespan. This simple project will boost your confidence and provide a satisfying sense of accomplishment.

    Share:

    How to Build a Small Pallet Shed for Efficient Outdoor Storage

    How to Build a Small Pallet Shed for Efficient Outdoor Storage

    Constructing a Durable and Efficient Small Pallet Shed for Outdoor Storage

    The need for efficient outdoor storage solutions is ubiquitous, particularly for homeowners and those with property requiring the safekeeping of tools, equipment, or other materials. A pallet shed offers a cost-effective and environmentally conscious alternative to traditional storage structures. This comprehensive guide details the process of constructing a small, robust pallet shed, emphasizing durability and practicality.

    I. Planning and Preparation: Laying the Foundation for Success

    Before embarking on the construction process, meticulous planning is paramount. This phase encompasses several crucial steps that directly influence the final product's quality and longevity.

    A. Assessing Your Needs and Site Selection

    The first step involves a thorough assessment of your storage needs. Determine the dimensions of your shed based on the items you intend to store. Consider factors such as the size and quantity of your possessions, requiring sufficient internal space for convenient access and organization. Once the size is established, select a suitable location on your property. This location should be level, accessible, and comply with any local building regulations or homeowner association guidelines. Ensure the chosen site offers adequate drainage to prevent water accumulation and potential structural damage.

    B. Material Acquisition and Preparation

    The primary material for your pallet shed will be reclaimed pallets. Source pallets from reputable sources to ensure they are free from pests, rot, and hazardous materials. Inspect each pallet meticulously for damage, prioritizing those in good condition with minimal warping or breakage. You will also require additional materials, including:

    • Concrete blocks or a suitable foundation: For stability and to prevent ground rot.
    • Pressure-treated lumber or metal framing: For the roof structure, depending on your chosen design.
    • Roofing material: Tarps, corrugated metal sheeting, or asphalt shingles, depending on budget and desired aesthetics.
    • Fasteners: Nails, screws, and potentially bolts, depending on the pallet wood and framing material.
    • Tools: Hammer, saw, drill, level, measuring tape, safety glasses, work gloves.
    • Optional: Exterior paint or sealant to enhance durability and weather resistance.

    Before commencing construction, prepare the pallets. Remove any loose nails or staples that pose a safety hazard. If necessary, clean the pallets thoroughly to eliminate dirt, debris, and potential pests. Consider sanding rough edges for improved safety and aesthetics.

    II. Construction: Building the Pallet Shed Structure

    With the planning and material preparation complete, you can begin constructing the shed. This involves several interconnected steps, each requiring careful execution.

    A. Foundation Construction

    A stable foundation is critical for the shed's longevity. Begin by leveling the ground where the shed will be located. This may involve removing debris, filling in low spots, or compacting loose soil. Construct a foundation using concrete blocks, arranged to create a perimeter matching the desired shed dimensions. Ensure the blocks are level and stable. Alternatively, if the ground is exceptionally stable, you might use a compacted gravel base.

    B. Wall Assembly

    The pallet walls form the core of your shed. Begin by assembling the corner sections, using sturdy pallets with minimal damage. Connect these corner sections using additional pallets, arranging them vertically or horizontally based on your design preference and pallet dimensions. Ensure the pallets are tightly fitted together, using nails, screws, or other fasteners to secure the joints. Reinforce the joints for added strength and durability.

    C. Roof Construction

    The roof design should complement the overall shed structure and offer adequate protection against the elements. You can create a simple gable roof using pressure-treated lumber or metal framing. This involves constructing a frame that extends beyond the walls to provide overhang, protecting the walls from direct rainfall. Once the frame is complete, apply your chosen roofing material, ensuring proper overlap and sealing to prevent leaks. Consider using waterproof sealant along all seams and joints for added protection.

    D. Door and Window Installation (Optional)

    To enhance functionality and accessibility, consider incorporating a door and potentially a window. For a door, you can use an existing pallet section or construct a frame using pressure-treated lumber. Install hinges and a latch mechanism. Similarly, a window can be created using a repurposed frame or new lumber, ensuring secure installation to prevent drafts and enhance ventilation.

    III. Finishing Touches: Enhancing Durability and Aesthetics

    Once the basic structure is complete, several finishing touches can enhance the shed's longevity, appearance, and functionality.

    A. Weatherproofing and Sealing

    Applying a weatherproofing sealant to the exterior surfaces of the pallet shed is crucial for protection against moisture damage. This step significantly extends the life of the structure. Apply the sealant liberally, ensuring full coverage of all pallet surfaces, joints, and seams.

    B. Paint or Stain Application (Optional)

    To enhance the shed's aesthetic appeal and provide additional protection, you can apply paint or stain to the exterior. Choose weather-resistant options designed to withstand exposure to the elements. A consistent color scheme can create a visually appealing structure.

    C. Internal Organization and Storage

    To maximize the storage capacity and efficiency of the shed, implement a well-organized interior. This might involve installing shelves, hooks, or other storage solutions, depending on the contents you plan to store. Consider using additional reclaimed materials for interior organization whenever possible.

    IV. Safety Considerations: Prioritizing Safe Practices

    Throughout the construction process, prioritize safety measures to prevent accidents. Always wear appropriate safety gear, including safety glasses and work gloves. Use caution when handling power tools and sharp objects. Ensure proper ventilation in the work area, especially when using paints or sealants. Inspect the finished shed for any potential hazards, making necessary adjustments to ensure a safe environment.

    By following these guidelines, you can successfully construct a durable, efficient, and aesthetically pleasing pallet shed, providing valuable outdoor storage space while promoting sustainability through the repurposing of reclaimed materials.

    Share: